In 2018, Facebook introduced a feature called 3D Photos, designed to add depth and movement to portrait mode shots. This innovative feature breathes life into images, creating a lifelike dimension that’s viewable in both the News Feed and VR. As someone who’s experimented extensively with this technology, I’m excited to share my insights and a step-by-step guide on how to create and even “hack” Facebook 3D Photos.
What are Facebook 3D Photos?
Facebook describes 3D Photos as “a new way to share your memories and moments in time with a fun, lifelike dimension in both News Feed and VR. With technology that captures the distance between the subject in the foreground and the background, 3D photos bring scenes to life with depth and movement.”
My interest
I have to agree with their statement – it is a really fun way to share photos and since i’ve had access to the Facebook 3D photo feature I’ve been back using Facebook… a lot.
Privacy concerns aside (we all know there are lots of issues) – Facebook and the newsfeed has [overtime] become a boring and ad-exhausted experience; there’s been little released in terms of innovation and instagram has become the weapon of choice for “photo-focused-posting”, leaving the newsfeed to become cannibalised by advertisements and the rare update from my brother-in-law (shout out to Andrew).
The 3D photos posted by Hangingpixels Photo Art inspired me to investigate more, and become a hypocrite by turning my attention to creating 3D Photos with an aim to engage audiences across Facebook pages ( yes, this would eventually become a marketing/ad post type… hypocrite… i know… i know).
How it works
The magic is in the Depth Map – to create a Facebook 3D Photo, your photo needs to have a depth map. The science on how the whole process works can be found in this great article from TechCrunch – How Facebook’s new 3D Photos work.
Depth maps are created by your phones duel camera hardware. Apple’s portrait mode requires two lenses because each lens does something different – One is a wide-angle lens, while the other is a telephoto lens (iPhone Camera Specs). The telephoto lens works to capture the image and the wide-angle lens works to capture data about how far away the subject is, which it then uses to create a depth map.
Simply put: Portrait mode photos are created by the two cameras on the back of your phone – portrait images are 2 images sitting on top of each other, one image is the actual photo – the other is the depth map.
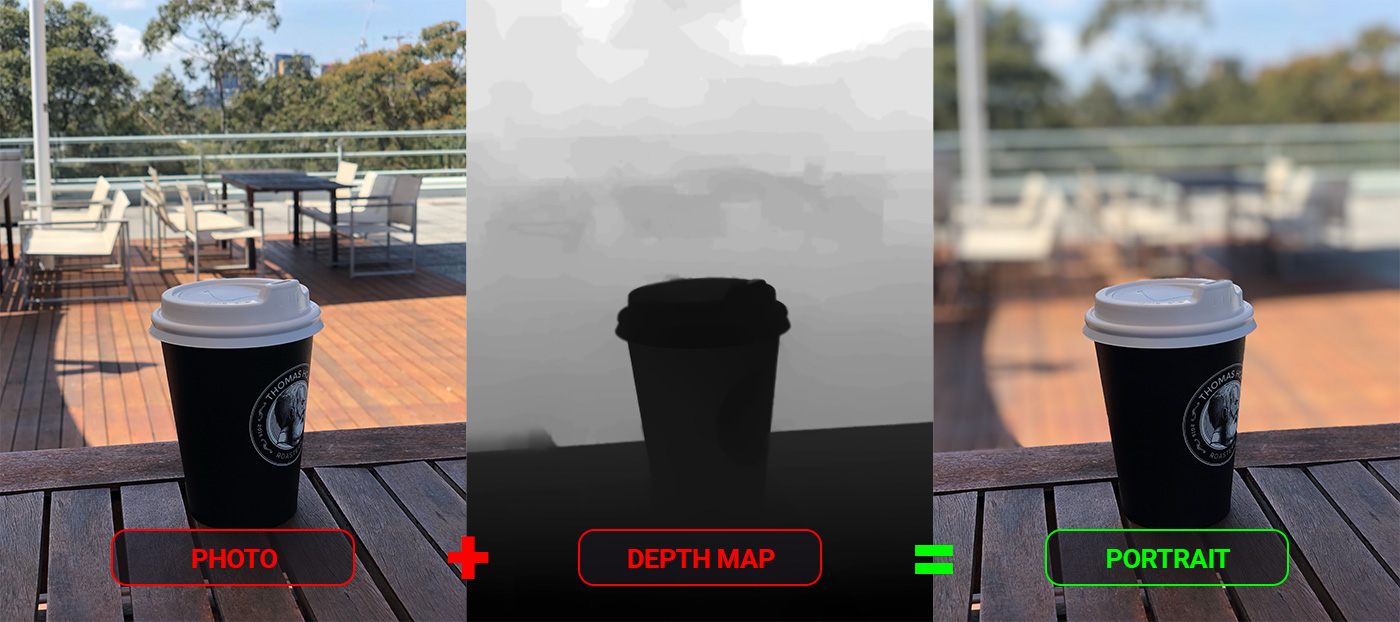
The iPhone uses the depth map to computationally blur backgrounds and other subjects that are behind the main focal point. The darker areas in the depth map are the focal points and the lighter areas are background/foreground (which gets blurred to create a DLSR effect). See image below.
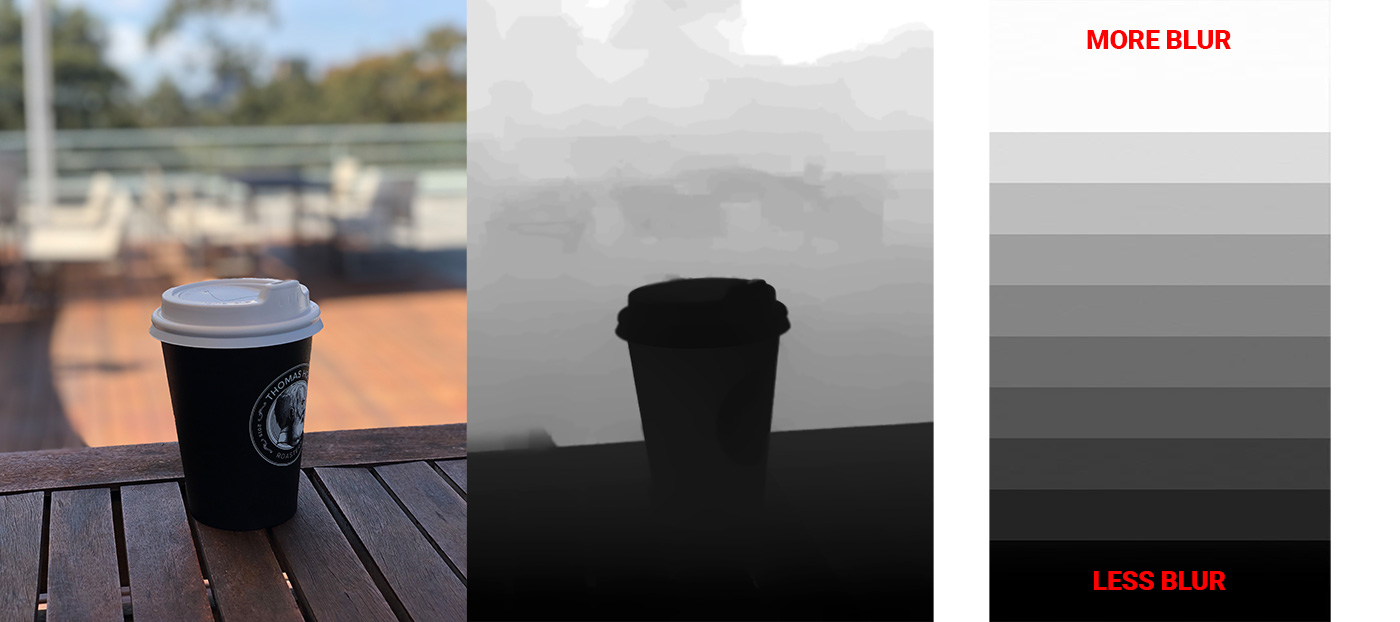
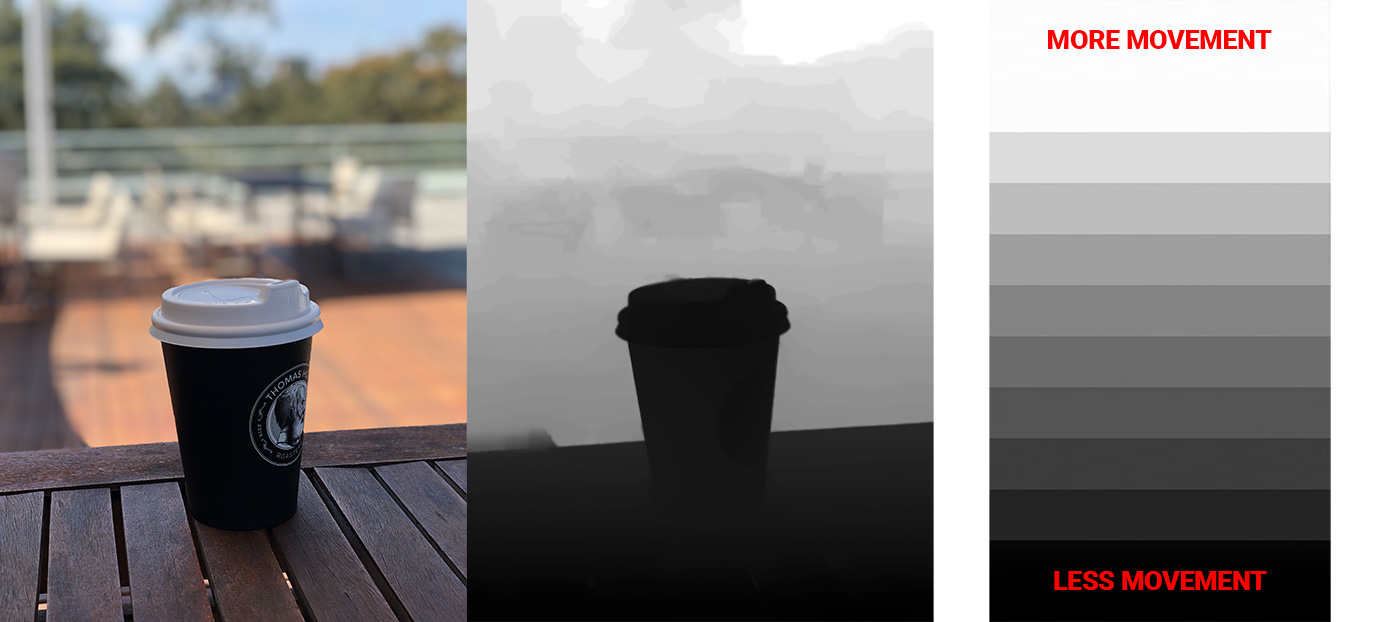
Now that we understand whats involved in a portrait photo, we can begin to manipulate the way it functions. Remember: The iPhone uses the duel cameras work [which work together] to create a portrait photo, the wide-angle lens works to capture data about how far away the subject is so it can create an idea of depth and blur out objects furthest away. The thing is – the same logic works with the Facebook 3D photos – only the depth map is used again to create the beautiful moving parallax photos for the 3D effect. See image below.
Now to the good stuff…
Creating a work around so Facebook will accept your non-iPhone Shot images
Since pushing out a few examples to some of the great 3D photo communities on Facebook – a lot of people have been asking for a tutorial… “how do i hack the Facebook 3d Photos feature” etc. So for this walkthrough we’re going to attempt to add text to our 3D Facebook images. Note: It’s probably best to view this walkthrough on desktop as you can see the effects in motion.
First off – You’re going to need a few little tools.
- iPhone with Portrait Mode
At the time of this post: To upload one of these 3D photos, you’ll need an iPhone the supports/shoots in Portrait mode. Portrait mode is only available on “Plus” and some newer models of iPhones — iPhone 7 Plus, iPhone 8 Plus, iPhone XS, and so on. So… You’re going to need one of these devices. - Photoshop or other image editing software
If you’ve read the information in this article – you’ll know that we will need to create a custom Depth Map for our final product. For this you’ll need to use an image editing tool like Photoshop (you can use most image editing tools to achieve the end result – but I’ll be using Photoshop for this walkthrough). - Depth Cam – Depth Editor
Depth Cam is a fantastic app for iOS which allows users to edit and import depth maps of photos. You can download it from the app store. - Patience… and lots of it
Unfortunately you wont find this tool online. It takes a bit of trial and error to get a great looking 3D photo, you’re going to come across things that make no sense and things that are just too hard to achieve – but persevere, you’ll learn very fast.
Step 1 – Take a photo
- Take a photo using your iPhone
- Send the photo to your desktop
- Open your photo in Photoshop
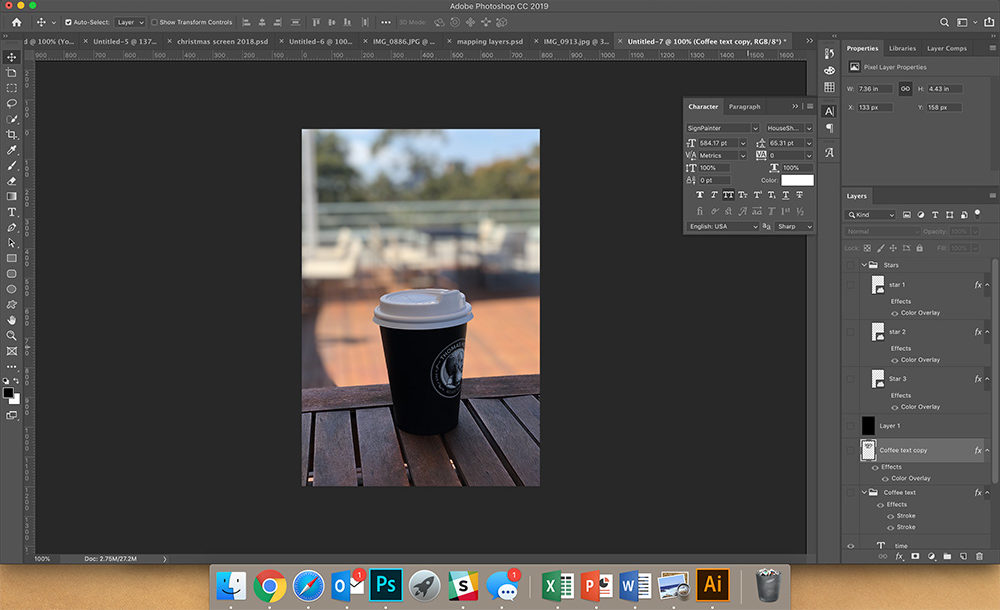
Step 2 – Edit your Image
- Resize your canvas to 1200×1800 or 1800×1200 (this is important – Facebook will not import a 3D image without these dimensions)
- In Photoshop – begin adding new layers (your text and vectors). Keep these additional items as geometric as possible – Sharp edges seem to get distorted in the final product (but play around and see what works)
- Once you’re happy with your image/photo – save it to your desktop
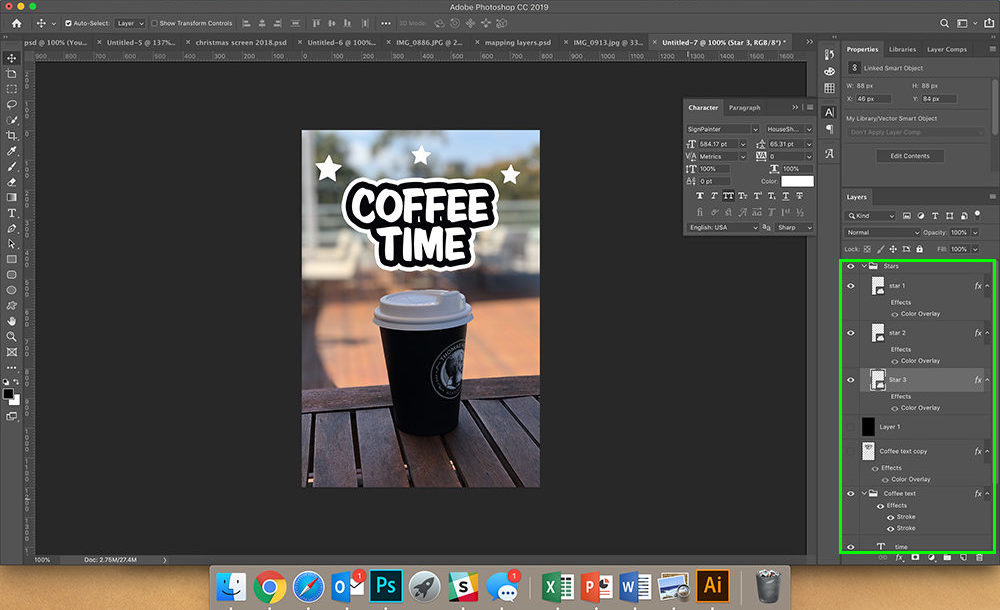
Step 3 – Create your Faux Depth Map
- In Photoshop – Hide your original Photo (or background image)
- Keep your new layers visible (the ones with text/vectors)
- Earlier in this article we discussed how depth maps work and how different shades of grey effect the movement of 3D photos – what you’ll need to do now is play around with the ‘new layers’ that you have created and begin giving each of them a grey overlay (you’ll do this in Photoshop)
- Logic would suggest that you make the main background black (so it will not move and stay static) however, you should go with a grey tone that sits somewhere between the greys you are using on your ‘new layers’.
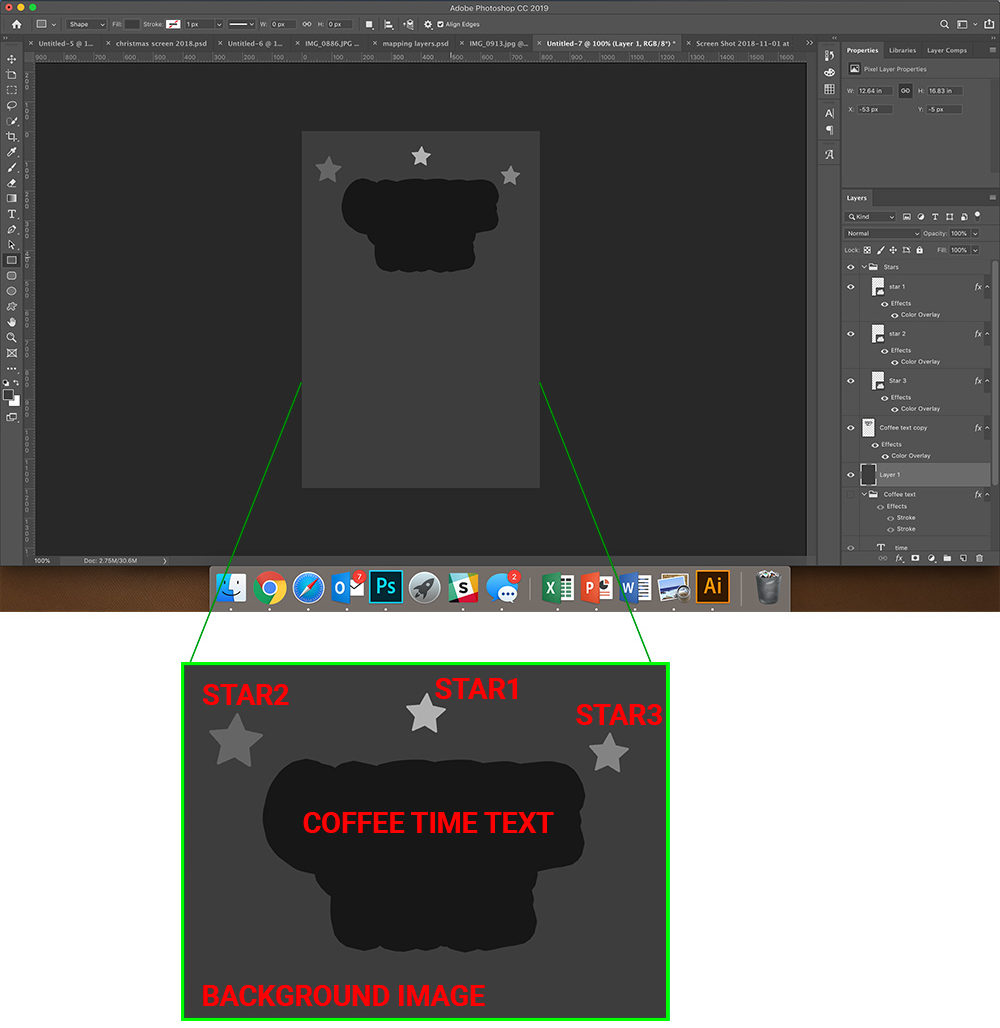
- Grey hex values I’ve used here are – Background:#3d3d3d | Coffee Time text:#171717 | Star1: #b0b0b0 | Star2: #656565 | Star3: #838383
- Once you’re happy – Go ahead and save to your desktop (remember to save the PSD file as you’ll probably want to play around and perfect your final product)
Step 4 – Move your images to your iPhone
- Now that you’ve created your image and your faux depth map you can save them back to your iphone
- Send your images using Airdrop (if you’re on a Mac or email them to yourself if you’re on a PC)
- Both of these images should be in your ‘All Photos’ album on your iPhone
Step 5 – Merge your images using DepthCam
- Now that you’ve got both of your images on your iPhone you can begin to create your portrait image so it can be consumed by Facebook to create a 3D Photo
- Open the DepthCam app on your iPhone
- Follow the sub-steps below
Step A

Open the ‘Photo Library’
Step B

Select your image (not your depth map)
Step C

Import your Depth Map
Step D

Select the Depth Map you created in Photoshop
Step E

Save your photo (Select ‘Save Photo’ from the popup)
Step F

Now your photo is saved (You’re not done yet) – click to open the ‘Photo Library’ again
Step G
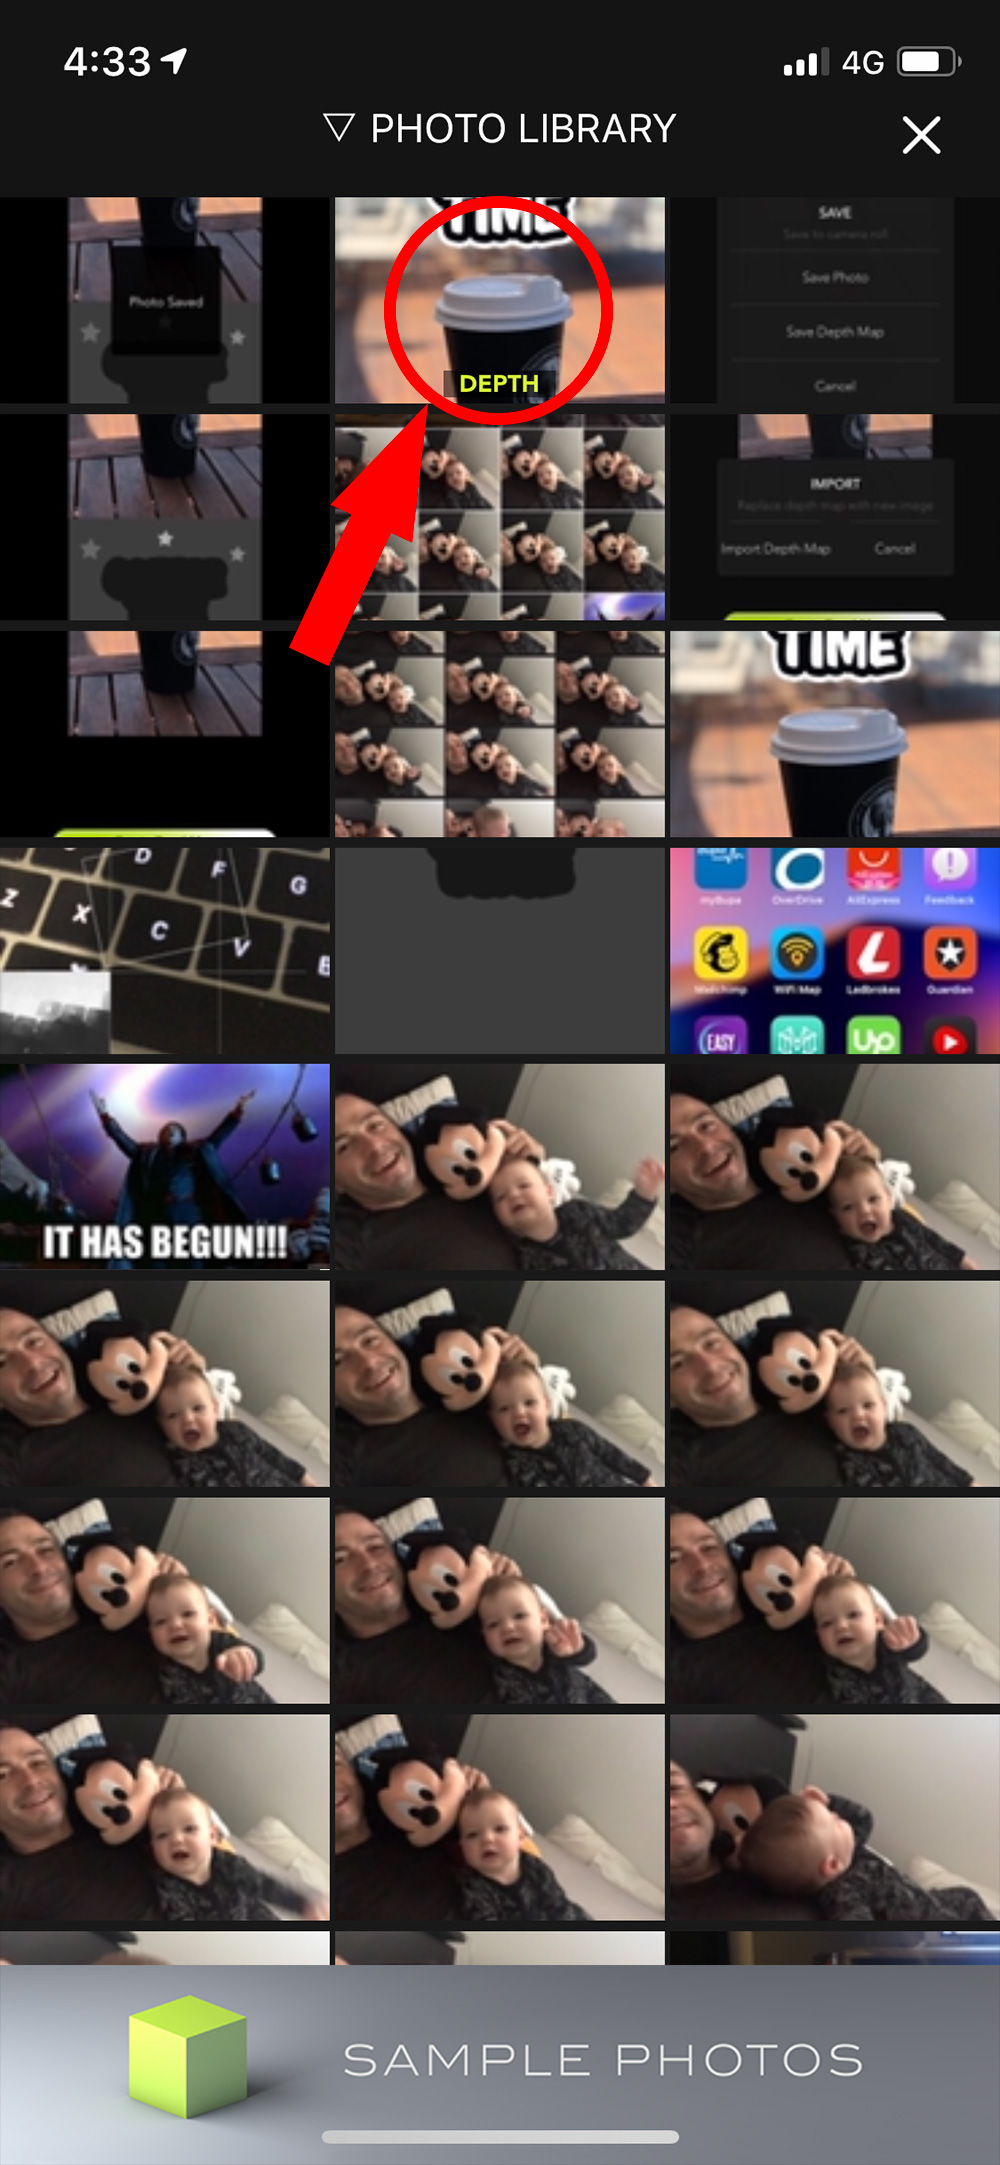
Select your image again (note: you’ll now see a little green ‘Depth’ title over the image
Step H

Now the image and the depth map will appear again – but all you have to do this time is tap the little greyed out ‘Portrait’ button on the top right (it should turn green once tapped)
Step F

Hit the ‘Save’ icon again and then tap ‘Save Photo’ on the pop up.
Step 6 – Upload your 3D Photo to Facebook
- Ok – you’re done with the image editing. Yay!!!
- Open your Facebook app on your iPhone
- Tap the “What’s on your mind?” text to create a new post
- Scroll down the options (Photos/Videos, Tag people, etc) until you see ‘3D photo’
- Select the image you’ve just created
- Done
If you want to start creating 3d Photos from an image captured by an android/DSLR/etc – the same theory applies (see image below – note: it looks a whole lot better as a post on the Facebook App). Create a depth map using grayscale image/layers in Photoshop and play around until you get the desired results. I’ll do another post if there’s enough interest.
Thanks for reading. Hopefully I’ll have something else to write about soon. (sorry about the spelling and grammar – this was a quickie).
Email: info@marckeegan.com
Best of luck with the 3D Photos.
Credits to the following for their content and work online that supported me in these learnings.
Hanging Pixels
Mike Mirabal
TechCrunch
Apple


waiting for desktop / pc tutorials on how to do this. thanks
Hi,
thanks for writing all this down. You seem to be the first one out there. 🙂 I’ve been trying to figure out the same and finally got to the very same procedure you’ve put up here. 🙂 However, I got stuck at the very last point of uploading the 3D image. Obviously the problem might be that I have an iPhone SE, which I know doesn’t support this in any way. But I have to ask: Do you have any idea how to push the FB app on older iPhones to give you the option of uploading a 3D image? Because otherwise my newly created 3D image sitting in the Photos app is just for nothing. 🙂
Thanks!
R.
Amazing tutorial Marc, thanks for your time 🙂
Thank you for the kind words!
I wish I can do it by my PC
Sorry I forgot that I activated the translation …
“Hello,
Thank you for sharing.
Did you write the article for photos via an android or DSLR?
I would like to know how to do without iphone. “
Hi! thank you for this tutorial! Can I use Adobe Illustrator?
Yes – you can use Adobe Illustrator. The concept remains the same.
Awesome, thank you!